


Monday, December 20, 2010
How I Got TV In To Any Room I Want: DVBLink in Action
Posted by Andy Dixon in "Digital Home Talk" @ 07:00 AM
Two months ago I made the decision to ditch satellite TV in my house and revert to using the standard free terrestrial TV as well as the free satellite TV I could still get via my dish. With the savings made from no longer paying for a monthly subscription I built a new Windows Media Center pc with two satellite TV cards, one of which can accept a terrestrial signal as well. Overall, that project went well and I now have a fully functional set-up that gives me everything I had before, well, everything except the live pay per view football! However, I was constantly having problems with the in-built TV guide being wrong or not showing any details about what TV shows were scheduled. I tried a number of fixes found on websites such as The Green Button, but to no avail. Whilst in my search for a solution I discovered a software product called DVBlink which caused me to open my eyes a bit. Not only can it handle importing guide data from third parties direct in to the Media Center guide, but it could also allow me to stream live TV to other devices around the home via my local LAN. 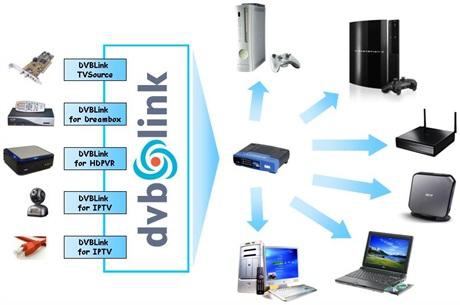
What? No extra TV cable needing to be fed to the bedroom? No extra satellite LNB's? No extra TV cards? It all sounded too good to be true but I did some more reading and finally decided I would give it a try. I thought that the software would be expensive but it's actually very reasonable. There is a special offer on currently to buy the server and network pack together for $50.72, and to make the deal sweeter there is a 20 day trial period so I could try it out and prove it works before paying for it.
First of all let's see what the official description of DVBLink is:
"DVBLink product seamlessly integrate Satellite, Cable and IPTV sources into MediaCenter, including support for MPEG-2 and MPEG-4 HD video, multichannel audio, EPG information, teletext and subtitles. DVBLink enables all native TV control features of MediaCenter for these sources such as Guide listings, live TV, time-shifting, instant and timer recordings etc.
With a unique Guide a la Carte feature user can select source of EPG information for each channel - MediaCenter built-in Guide service, TV provider program listing or from XMLTV files.
Combined with DVBLink Server Network Pack, DVBLink products let you enjoy your favorite TV channels throughout your whole house - in Windows MediaCenter, running on network computers, on UPNP enabled clients such as Sony PlayStation3, on nettops and laptops, running Windows 7 and on XBox 360 - and over the Internet using internet browser!."
Firstly I worked out what I wanted to achieve, and how I would achieve it. Currently I have my primary Windows 7 Media Center pc in the living room connected to my Windows Home Server via a gigabit switch. The ground floor equipment is connected to the broadband router upstairs using a Netgear HomePlug Adapter Kit. Upstairs in the office I have my main Windows 7 pc, and I also have a Dell M1330 laptop, also running Windows 7, which I use on the road or in the bedroom to watch a DVD or surf the internet.
To achieve what I wanted I would have simply have to install the correct software on the correct PC's:
Living room Media Center - DVBLink Server, DVBLink TV Source, DVBLink network server
Office PC - DVBLink Network Client
Laptop - DVBLink Network Client
So let's get started with the obvious place, the living room Media Center pc.
Installing the Server Software
First I downloaded the TV Source and Network Pack software from the DVBLogic website. The zip file for the TV Source contains two MSI files that need to be installed and in the correct order, the server sofware, then the TV Source software.
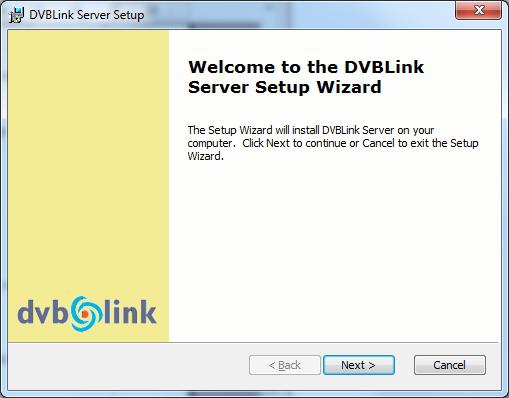
Figure 1: Installing the DVBlink server software on the living room Media Center PC.
Installing the server software is a simple case of accepting the licence agreement, choosing where I wanted to install the software, and then letting the installation complete. After the server software had installed it required a reboot of the pc. One reboot later and I then installed the TV Source software. After the install finished it automatically launched the server configuration wizard screen as shown below.
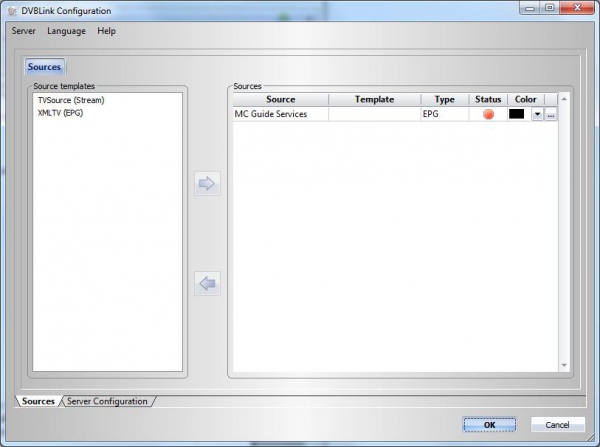
Figure 2: Screenshot of the DVBLink Configuration application that launches after installing the software.
At this point I was referring to the documentation which is included with the zip files I downloaded, and is very easy to follow and explained each step as I went along.
Firstly I added a new TV source for my first satellite TV card. I selected the TV Source on the left and added it to the right side, giving it the name of DVB-S #1 when prompted.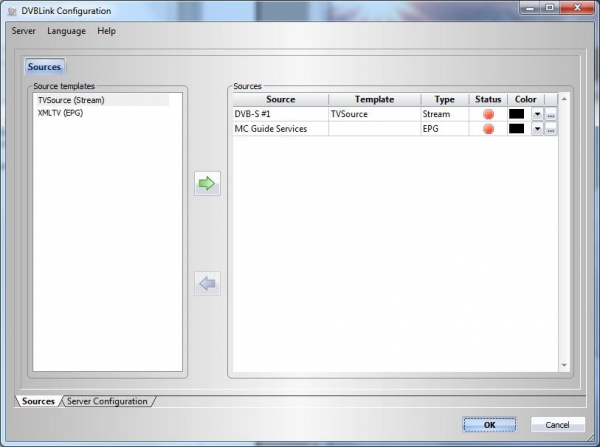
Figure 3: A screenshot of the first TV source that I have created and added to the list.
My first TV source is a satellite card (DVB-S2). So I selected the card in the status box which marked the card as Active.
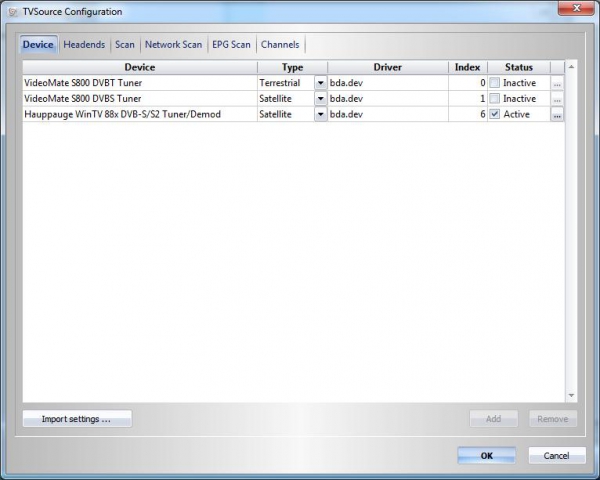
Figure 4: Having created a TV source, I now choose which of my TV cards will be used for that source.
Clicking the Headends tab and then clicking Add at the bottom allowed me to add the Satellite settings needed to allow the software to scan for channels in the next step. I chose the satellite which my dish is pointed at from the list in the provider column. Since I am configuring a satellite card, only a list of satellites are provided. If it was a terrestrial card, then only a list of terrestrial providers are listed.
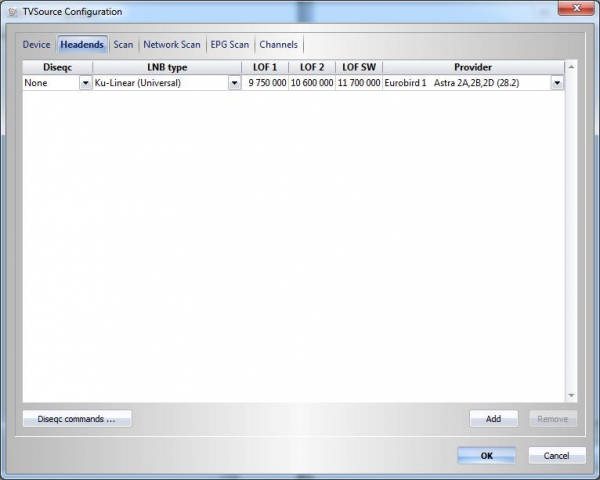
Figure 5: Choosing which satellite my dish is pointed at.
Next I clicked on the Scan tab, and then prooceeded to scan for all the channels my TV card can see. This step takes a while, so I grabbed a coffee and put my feet up.
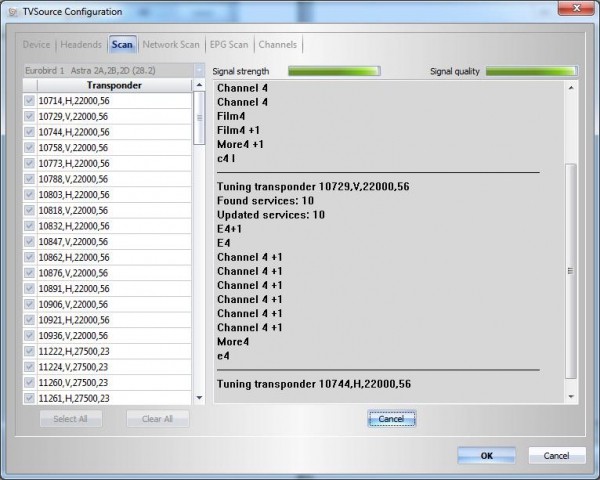
Figure 6: Scanning for TV channels!
Once the scan completed I could see a list of all the channels found on the Channels tab. Clicking Ok took me back to the first screen where I could add the remaining two TV cards I have. There is a nice feature here to import the settings from another card if they have the same signal. As my other satellite card does indeed have the same settings as the one I had just installed, I was able to import the settings and not have to repeat all the steps I had just done. That simply left the terrestrial card (DVB-T) to set up and I can tell you now that scanning for satellite channels is a lot faster than scanning for the terrestrial channels was. I should have saved the coffee for that scan!
After adding all three TV cards and configuring them I was now faced with deciding which of the hundreds of channels I actually wanted to appear in my Media Center list. This could be a big job if you are a large family with a lot of different likes and dislikes, but for me as a single guy it was easy. Shopping channels were the first to go, followed by all the encrypted channels seeing as I no longer have a paid service. I actually managed to reduce the list of channels from 1024 to 46 in total!

Figure 7: Choosing which TV Channels I want to see in Media Center. There were a lot to choose from.
In Media Center you have the option to merge your TV cards with the same channels together so you don't end up with three CBS channels or such. This is now configured in DVBLink instead and it is much easier to do so. There is an option to merge all channels with the same name together which the software promptly did. i was then able to drag and drop any that it missed due to the terrestrial and satellite spelling differences.
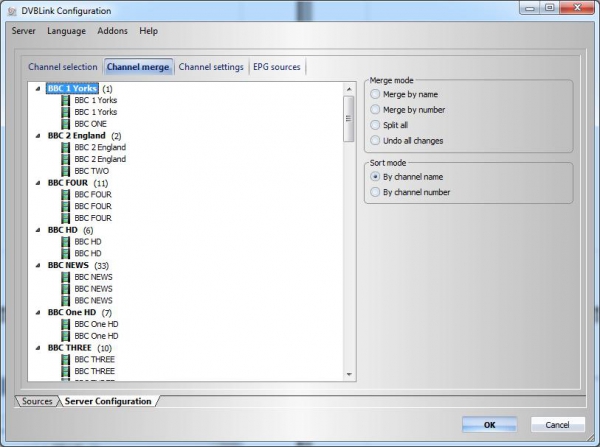
Figure 8: Grouping the TV channels together so they appear as one channel in Media Center.
Next up I had the option to configure the channel numbers for each channel. I'm a bit fussy here and I like to have all my channels in a nice order, and all numbered sequentially with no gaps. I know that it might not look quite so orderly to most of you, but it makes sense to me. There is a nice option here to put a pin on any channel you want, which is handy if you have small children and you don't want them having access to certain channels. Perhaps I could put this on and charge guests TV access when they visit and stay in the spare room!

Figure 9: Organising the channels in to some semblance of order. Honestly, there is some logic here somewhere.
The final step of configuring the server is to select where you want to get your EPG data for each channel from. This is the part of the software I was initially interested in as it was this problem that led to me finding it after all. I was glad to see there are a lot of options to choose from and I was able to set up all my channels very quickly with the correct source of EPG data. Clicking OK took me back to the first screen and I exited the Server Configuration application. I was now ready to configure Media Center and see if I could still get a TV signal.


