


Thursday, June 28, 2007
Gorgeous Photo Layouts with LumaPix's FotoFusion v4: The Review
Posted by Jason Dunn in "SOFTWARE" @ 07:00 AM
Killer Quick Photo Collages
One of the things that originally caught my attention with FotoFusion was the way it could generate photo collages quickly. Photo collages look fantastic, but trying to create them in traditional photo editing programs is a tedious process. FotoFusion nails this: you click Auto Collage, select the images you want to include (which unfortunately is a bit clumsy), decide how many pages you want it to take up, select from creative enhancements such as shadows and borders, and decide if you want the images to be jumbled up or organized nicely. What's not intuitive is that when you click on/off a feature such as Shadows or Borders, the software will randomize the layout, putting differently-sized images in different locations on the page. I think a "Randomize" button might have made the process more obvious.
If you looking to make an album, fast, words can't express how optimized this process is. You select your 100 wedding photos, select the number of images you want on each page, and sort the layout by the date stamp on the images so they're all in order. Wedding photographers would kill for functionality like that. The last step is to select the page size you'll be printing it on, and once you click OK the photos are laid out on the page.

Figure 5: An ordered photo collage layout.
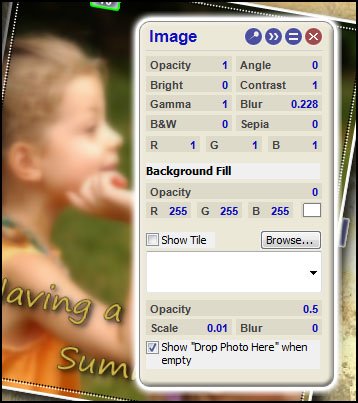
Figure 6: Photo adjustments are quick and easy.
If you don't like the location of a certain photo, it's a simple drag and drop to swap image locations. If you don't like the way an image was cropped, you can zoom in and move the image around inside the frame - you can get dramatically different looking photos when you change the aspect ratio of the frame and move the image to match. There's also basic red-eye reduction, along with the adjustments of opacity, brightness, gamma, B&W, contrast, blur, and sepia. It's no photo editor, but the basics are there. What's impressive is that you can select as many images on the page as you want, and you can make adjustments to all of them at once. This is particularly helpful if you want to apply a partial sepia tone to a group of images - it sure saves a lot of clicking.
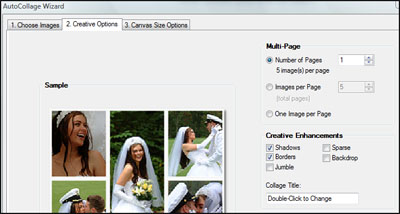
Figure 7: The user-interface for making the collages.
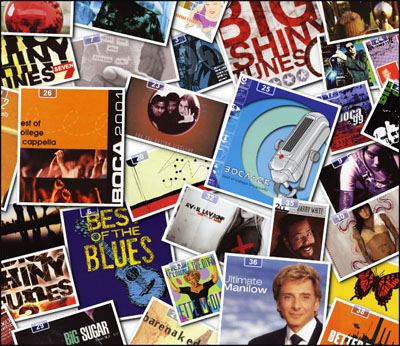
Figure 8: This is an example of the AutoJumble setting - pressing Alt+Shift+Q will give you a new jumble each time.
You can also apply mattes to photos and frames: this allows you to pick a frame and give it a distressed or jagged edge, make it into a star, or apply a texture (such as "rotting leather") to a photo. Combine that with a sepia effect and you can make any photo look old. The creative combinations are amazing!


