


Friday, March 20, 2009
Adobe Lightroom 2 Delivers A Great Raw Photo Workflow
Posted by Jason Dunn in "Digital Home Software" @ 07:00 AM
The Develop Module
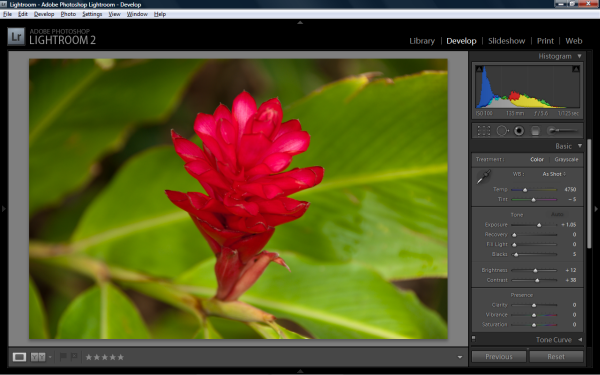
Figure 3: The Develop module is where your raw photos will go from "blah" to "wow!".
This is where most of the action happens because it's where your images are transformed with the extensive set of adjustment and editing tools in Lightroom 2. Beyond basic red-eye removal and clone/heal tools, the first version of Lightroom lacked any "real" editing tools – at most you could adjust your image, do some red-eye reduction and clone/healing, and if it needed any editing beyond that you'd open it in Photoshop or another editing program. Lightroom 2 is still no Photoshop (nor would I want it to be) but it does far more than earlier versions. The new editing tools introduced in Lightroom 2 are the Graduated Filter and the Adjustment Brush.


Figures 4 and 5: On the left, the original image. On the right, the image after a graduated filter is applied (the effect is exaggerated to make it easier to see). Notice that the sky in the top of the image is deeper blue, and the sign is darker, but in the bottom right corner, the building and sky still look the same.
The Graduated Filter tool, shown in action above, is a useful tool for adding punch to a skyline – but it can be applied at any angle, so the creative possibilities are endless. As someone who has a folder full of filters, but never gets around to using them, this is a feature I appreciate. The other important editing tool introduced with Lightroom 2 is the Adjustment Brush. In essence, this tool allows you to "paint on" your adjustments. Figure 6 and 7 below illustrate this nicely. I took this photo off the back deck of my house and spot-metred on the clouds bathed in the warm glow of a sunset. The clouds were exposed properly, but it had the effect of under-exposing the row of houses below the clouds, turning them into a black void.
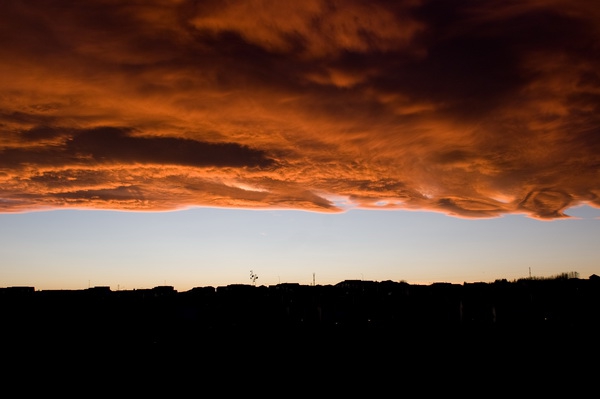
Figure 6: The original image – the metering was focused on the clouds, which blacked out the houses below.
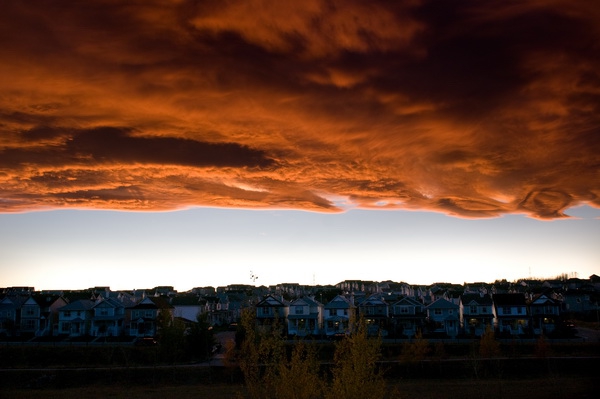
Figure 7: The adjusted image – the houses are recognizable now, but the clouds didn't change.
To improve this image, I used the Adjustment Brush to paint on a +2 exposure boost to the row of houses and trees at the bottom of the image. The Adjustment brush has a smart selection tool, and a re-sizable brush tip, that allowed me to be quite precise with my fix. It boosted the exposure on the lower third of the image, but didn't impact the orange clouds at the top of the image. The Adjustment Brush can be used to paint on all sorts of effects, including exposure changes, saturation, clarity, colour, and even a "Soften Skin" preset. Below is a more dramatic example of how this great tool can be used.
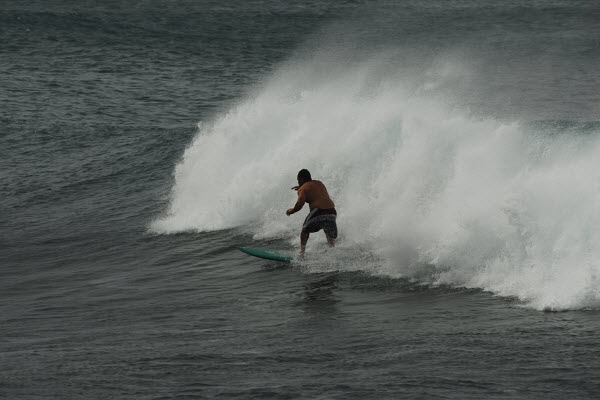
Figure 8: My original photo was underexposed, and shot on an overcast, "blah" day.
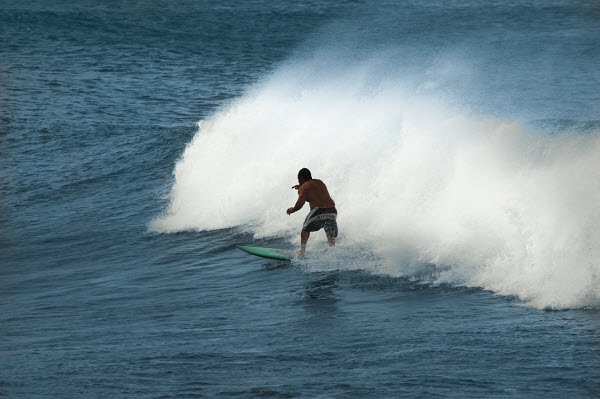
Figure 9: 60 seconds later with two applications of the Adjustment brush, the waves and water are a more pleasing colour and the exposure is boosted. That's powerful stuff - though use with caution lest all your images look cartoonish.
The Develop module has a huge number of adjustment tools, including temperature (to get that perfect white balance), tint, exposure, recovery, fill light, blacks, brightness, contrast, clarity, vibrance, and saturation. That's only in the basic section - there's the tone curve section, the HSL/Color/Grayscale section, the Split Toning section, the Detail section, the Vignettes section, and the Camera Calibration section. Oh, there's also cropping, spot removal, and the best red eye removal I've ever seen. Suffice it to say that Lightroom offers a staggering array of ways for you to adjust your image.
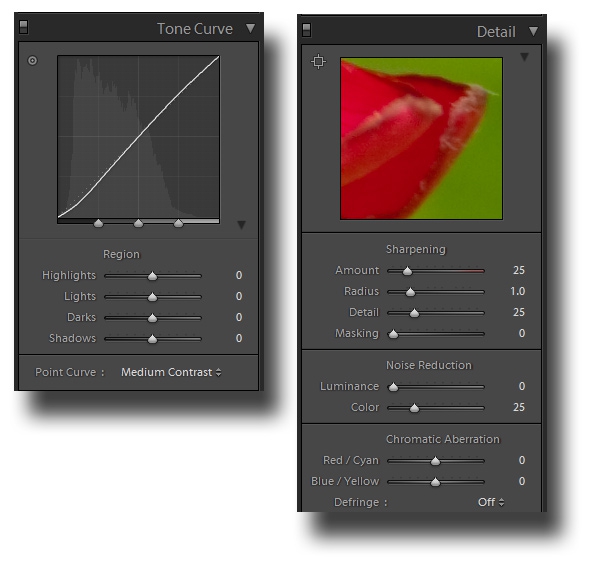
Figure 10: Two section of the development tools are shown above.
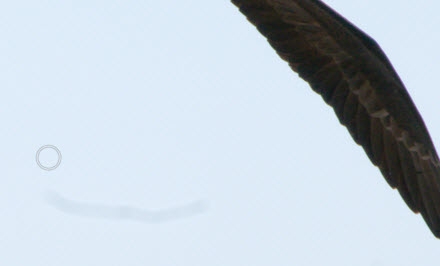
Figure 11: My kingdom for a clone brush rather than that little dot!
One of the things that image fixing tools lack is a true brush-on clone/heal tool. Instead you get a circle that you can resize and move around. This works great 99% of the time - because you're probably fixing dust spots or complexion issues - but that last 1% is where Lightroom falls flat on its face. In Figure 11 above, you can see that I had something long and thin in the shot, likely a stray hair on the lens, and getting rid of something like that with a series of circles was quite time consuming (one big circle wouldn't quite work). I don't need Photoshop-like masking and selection tools in Lightroom, but something more than the "dot" is needed.


